
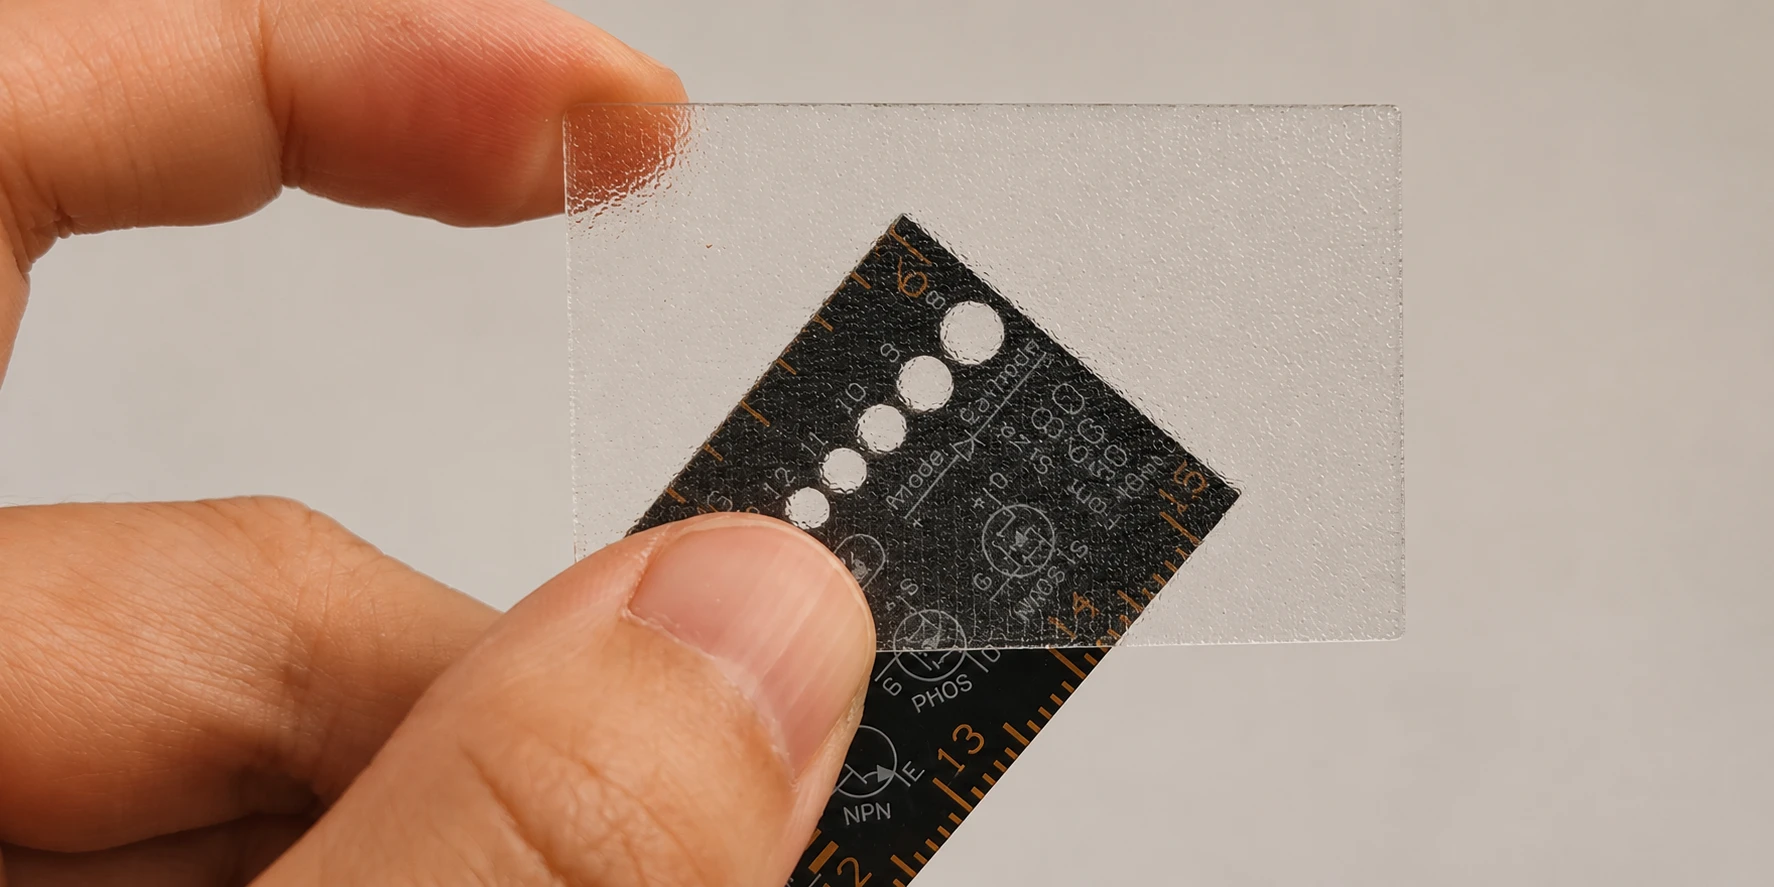
Clear PETG can look surprisingly cloudy straight off the printer. But a different spool isn’t always the answer. The two panels below use the same filament—the difference is in the print settings.
The left panel was printed with Bambu Studio’s default settings. The right panel uses optimized settings for better transparency. You can still see the printed texture, but the panel is noticeably less milky and lets more of the background show through.
Here are the five adjustments behind that result, with the exact values we use in Bambu Studio.
Why does clear PETG look cloudy?
FDM printers build a part from thin lines of melted plastic, one layer at a time. When those lines don’t fully fuse, tiny air gaps remain. Light scatters at these gaps instead of passing cleanly through the part, creating a cloudy appearance.
The goal is simple: help the lines fuse together and leave fewer gaps. Less cooling, more heat, slower printing and a denser internal structure all work toward that goal.
Start with dry filament, too. Moisture can create bubbles that make a transparent print look hazy before you even begin tuning.
Five settings for clearer PETG
These are the settings behind our thin-panel comparison, using a standard-flow 0.4 mm setup.
1Turn off the cooling fan
For a flat transparent panel, strong cooling can freeze the printed lines before they have time to fuse well. Turning off part cooling keeps the plastic warm for longer.
Open the filament settings, go to Cooling, and set both the minimum and maximum fan speeds to 0%.
2Increase the nozzle temperature
A warmer nozzle helps the plastic flow and fuse with the lines beside and beneath it. Our Bambu PETG Translucent preset uses 270°C for both the first layer and the remaining layers.
Find these values under Filament → Print temperature. If you use a different material, choose a temperature suited to that filament rather than copying this value automatically.
3Print slowly
Transparency takes time. Slower printing gives the hotend a manageable flow of plastic and helps each new line bond with the surrounding material.
In Process → Global → Speed, our preset uses 20 mm/s for the first layer, walls, infill and top surface. Start here for thin panels instead of using a fast general-purpose profile.
4Fine-tune flow and line settings
Even at a slower speed, gaps can remain if there isn’t enough material between adjacent lines. A small flow adjustment helps close them.
Flow ratio: 1.01
Under Filament → Basic information, our preset uses a flow ratio of 1.01. The aim is to fill small gaps without creating ridges from too much plastic.
Layer height: 0.1 mm. Line width: 0.5 mm.
Flow is only part of the picture. The shape of each printed line matters, too. We pair a fine 0.1 mm layer height with a wider 0.5 mm line width to help the lines make good contact.
In Process → Global → Quality, set both layer heights to 0.1 mm and the line widths to 0.5 mm. These are the dimensions used for our 0.8 mm panels.
5Use 100% infill and remove the top and bottom shells
A normal infill pattern leaves open space inside the model. That is useful for saving material, but it also creates more places for light to scatter.
Under Process → Global → Strength, use 1 wall loop and set both top and bottom shell layers to 0. Then set sparse infill density to 100%.
Choose Rectilinear for the sparse infill pattern and set the infill direction to 0°, matching our preset. This gives the panel a dense, straight-line internal structure rather than a sparse lattice.
What results should you expect?
Our 0.8 mm panels became clearer with this combination of settings, while keeping some visible print texture. Thickness, print orientation and the build plate’s surface also affect the finished appearance, so a thicker part may look different.
Try a small sample first if you’re using a different filament or model. You’re looking for less haze and better light transmission—not simply a shiny outer surface.
The material is the same. Better fusion and fewer gaps help more light pass through it.
Skip the setup with FloorPlan23D’s glass preset
These settings live in two places in Bambu Studio: the filament profile and the global process settings. FloorPlan23D includes both in the glass 3MF, so you don’t have to find and change every field yourself.
- In FloorPlan23D, choose Bambu-format 3MF and download Glass panels. If your project also has non-glass parts, download House & parts separately.
- Open the glass 3MF in Bambu Studio as a project to load its included settings.
- Check the printer, nozzle, build plate and your PETG Translucent spool or AMS assignment. Slice, inspect the preview and print.
Need help building the house itself? Follow our multi-level house tutorial.
The settings at a glance
A quick reference for the standard-flow 0.4 mm recipe described above. High-flow variants can use different values.
Process settings
| Setting | Preset value |
|---|---|
| Quality | |
| Layer height / initial layer height | 0.1 / 0.1 mm |
| Line widths | 0.5 mm |
| Strength | |
| Wall loops | 1 |
| Top / bottom shell layers | 0 / 0 |
| Sparse infill density | 100% |
| Sparse infill pattern | Rectilinear |
| Infill direction | 0° |
| Speed | |
| Initial layer / initial layer infill | 20 / 20 mm/s |
| Outer / inner wall | 20 / 20 mm/s |
| Sparse / internal solid infill | 20 / 20 mm/s |
| Top surface | 20 mm/s |
| Gap infill / bridge | 20 / 20 mm/s |
Filament settings
| Setting | Preset value |
|---|---|
| Filament / Flow | |
| Flow ratio | 1.01 |
| Max volumetric speed | 6 mm³/s |
| Filament / Temperature | |
| Nozzle / initial layer | 270°C |
| Nozzle / other layers | 270°C |
| Cooling | |
| Part cooling fan / min and max | 0% / 0% |
| Auxiliary part cooling fan | 0% |